
Upgrading from Centerprise 5.1 to 6.0
Centerprise 6.0 is a major release and is not a direct upgrade to version 5.1. What we mean by that is that Version 6 will install side by side with Version 5.x. Therefore, there is no need to uninstall Version 5.x. Version 6 is backwards compatible and can run dataflows created with Version 5.x. However, the same is not true for Version 5.x. It CANNOT run Version 6.x dataflows. That is, if you save a dataflow in Version 6, it will no longer be able to run in Version 5.x.
Installer
You’ll immediately notice that there are now two installers instead of one. This was done to alleviate confusion as to which configuration option should be selected in the installer when only installing a client. Now, you distribute the client installer only to users needing the client software.
Licensing
Both the client and the server are licensed separately (as in 5.x) and use completely different keys from those in Version 5. Version 5 keys WILL NOT WORK in Version 6. In fact, you cannot even enter them in the licensing screens. New in Version 6 is a mask in the licensing screens that prevents the client key from being entered in the server screen and vice versa.
Database Cluster
The biggest change and the item most likely to stand in your way to successfully running a dataflow right away is the change to the Centerprise job repository. Centerprise no longer ships with the built-in SQL Server CE database for this purpose. Instead, you must now configure this database ahead of time before running any job in Centerprise.
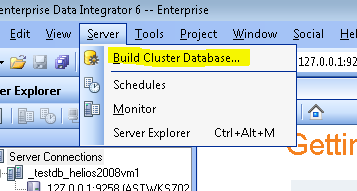
To do this select “Server”->”Build Cluster Database.”
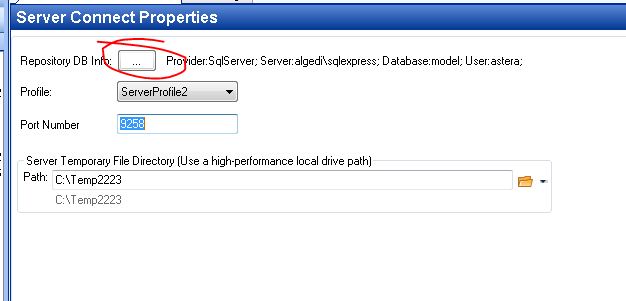
You will be presented with the standard connection screen:

Fill in this information and click “OK.” You will be prompted for confirmation informing you that clicking OK will reset any existing repository. After you click OK, a script will be run in the provided database and the necessary Centerprise Job tables will be created.
Configuring the Server
Now that the cluster database has been set up, the next step is to link the server to this cluster database. To do this, right-click on the server node in the server explorer tree and select “Configure Server.”

The configure server screen will appear. Click the ellipses button next to “Repository DB Info” to link the server to the cluster database.
You can ignore the server profile for now. This only useful if you have multiple servers, each with a different role to play in the Centerprise deployment. After this is configured, click the standard “Save” button for the changes to take place.
After you’ve clicked the save button, the server will appear under the cluster node in the Server Explorer and the job commands are now available.
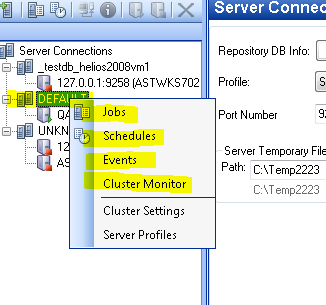
To add servers to a cluster, simply follow the exact same steps to configure another instance of a server and point to the same cluster. The default profile for the server is set to perform all tasks, including automatic fail-over and load balancing. To check the health of any particular server in a cluster, select the “Cluster Monitor” command.
This concludes upgrading from Centerprise 5.1 to 6.