Auto-Generate Layout (Beta)
ReportMiner’s AI capture process is the first step towards innovation in the traditional pattern-based template extraction via Artificial Intelligence. The Auto-Generate Layout feature lets you auto-create all the data regions and data fields with the click of a button. This feature helps save time and effort spent on manually creating a report model from scratch, making the entire extraction process quicker and more efficient.
The algorithm first identifies the tables and key-value pairs in the document and sends their meta-data to the ReportMiner designer. Information from this detection process is then reverse engineered to create a model layout. It is important to note here that this feature is a design-time convenience to jump-start the extraction process. Users can then fine-tune/tweak the layout which has been created automatically to fit their business requirements.
AGL comes with two beta sub-components called Auto-Create Fields (Single Instance) and Auto Generate Table. These drag-and-click options enable the user to create selected fields and selected tables respectively. In this article, we will see how we can use the AGL feature to create an extraction template within seconds and modify it using its sub-components.
Sample Use-Case
In this case, we have a PDF invoice for Lumos State Solutions opened in a report model.
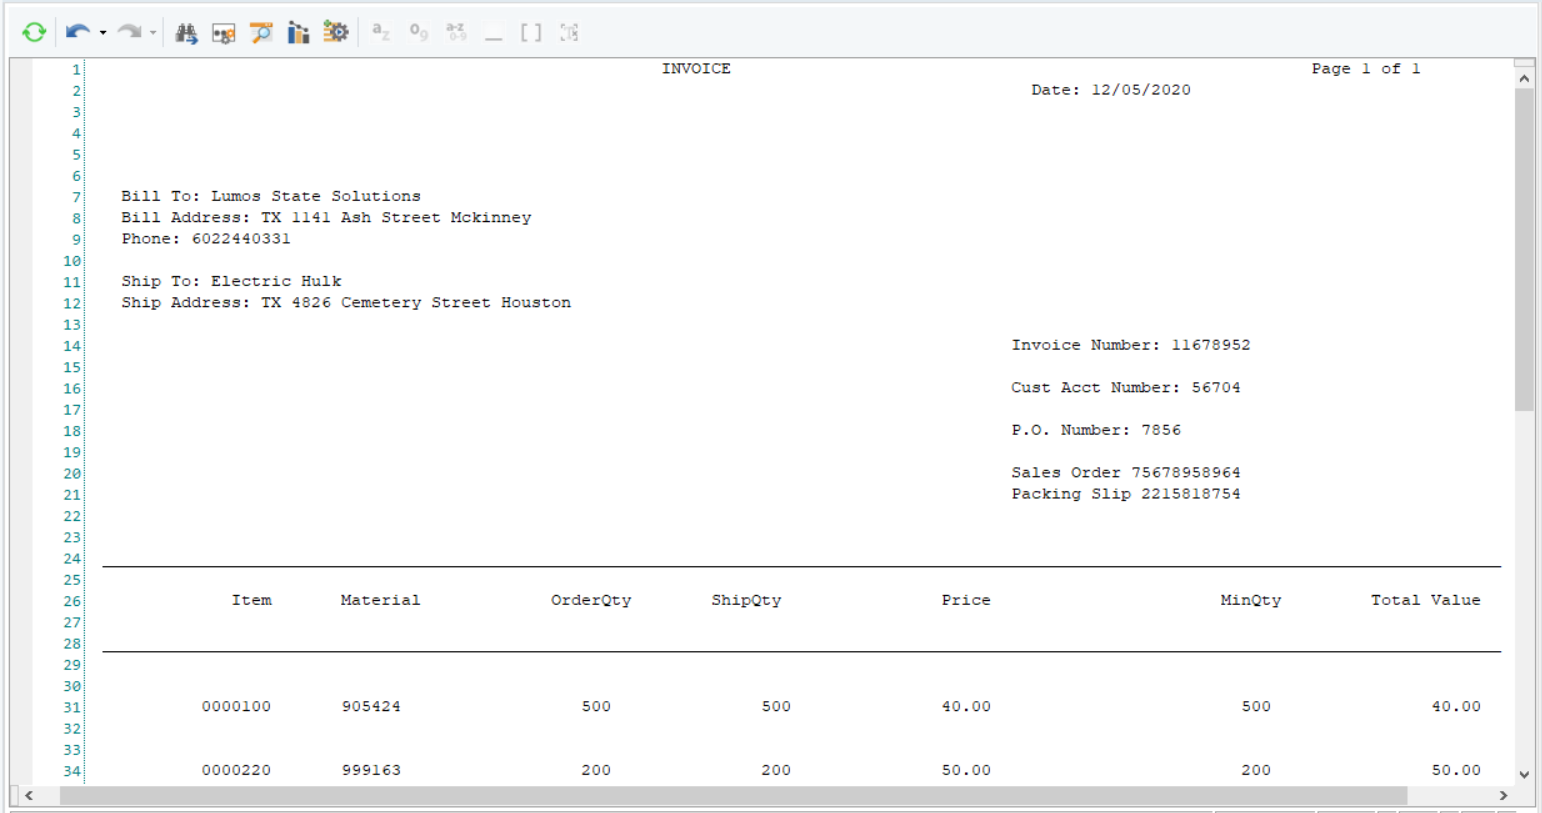
As we can see, the invoice contains some name value pairs at the top, followed by a table below it. Notice that the name value pairs are separated by colons and the headers of the table are all in one line. This is an ideal file to extract data from using the Auto-Generate Layout option. To learn more about the best practices for using AGL, click here.
Steps to Auto-Generate Layout
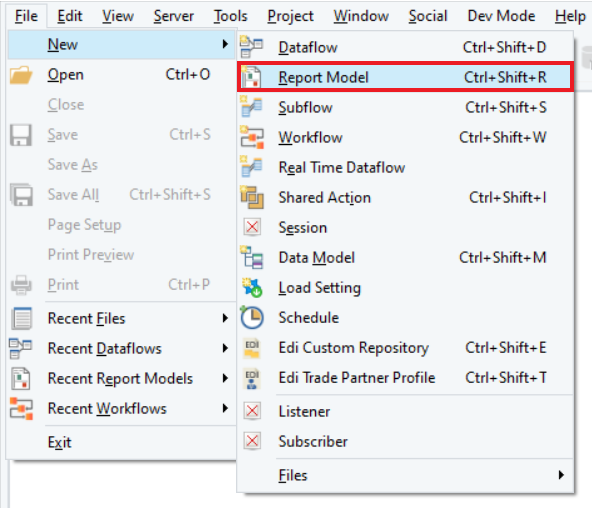
1. First, we need to create a report model. Go to File > New and select Report Model.
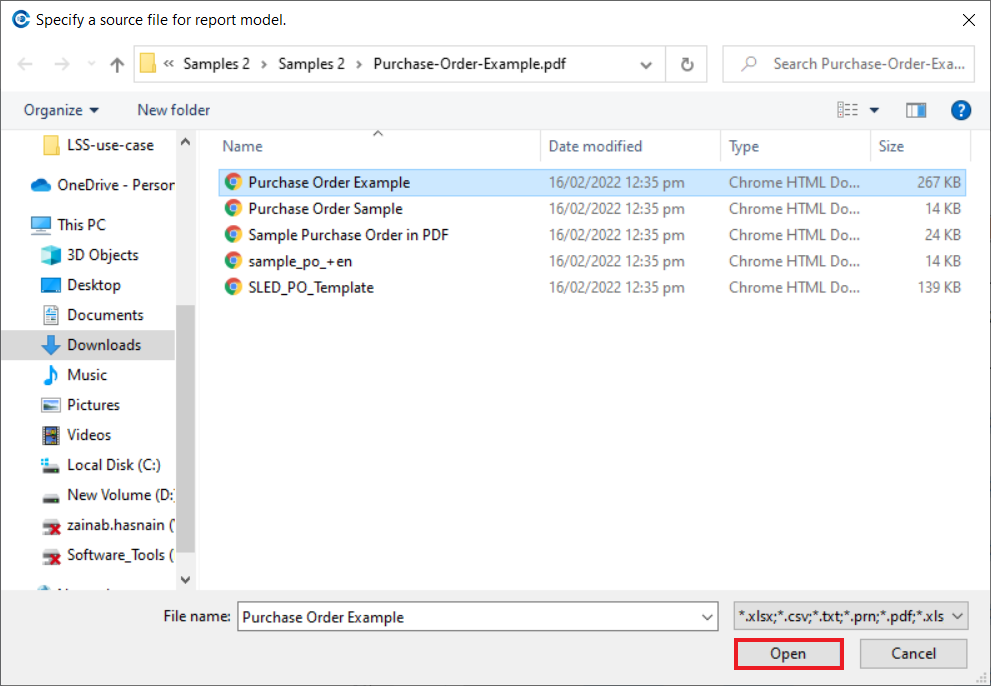
2. A pop-up window will open, asking you to specify the path of the source file you want to extract data from. Locate the directory containing the source file, select the file, and click Open.
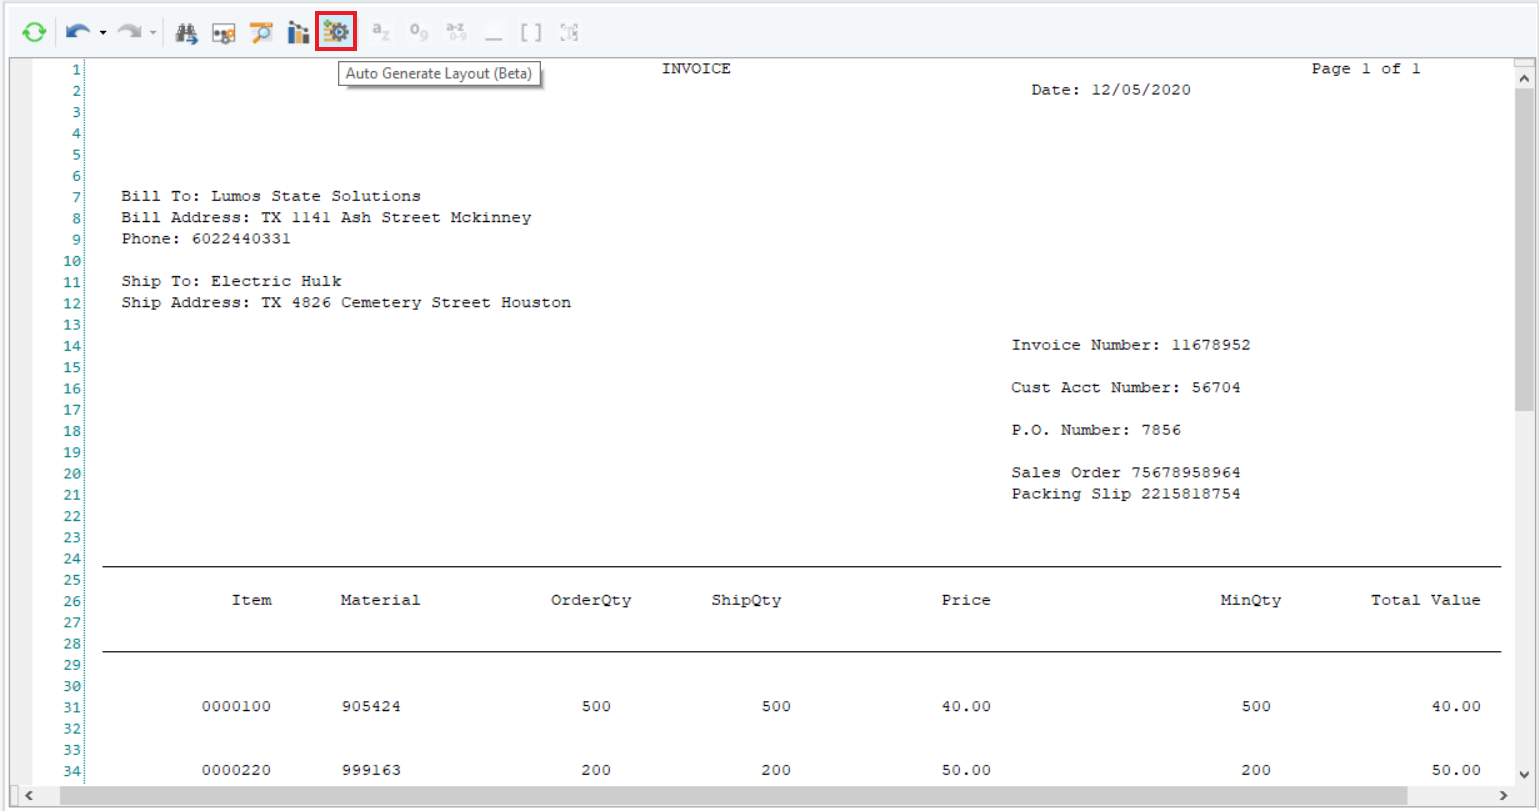
3. You can now see the source file on the canvas. Click on the Auto Generate Layout (Beta) option present in the toolbar to auto-create a layout.
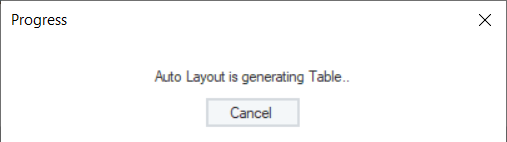
4. A Progress window will pop-up, showing the status of the process. You can stop the process by clicking on Cancel, if you wish. For now, wait for a few seconds.
5. An Output window will appear at the bottom, showing the details of the regions extracted from the unstructured invoice.
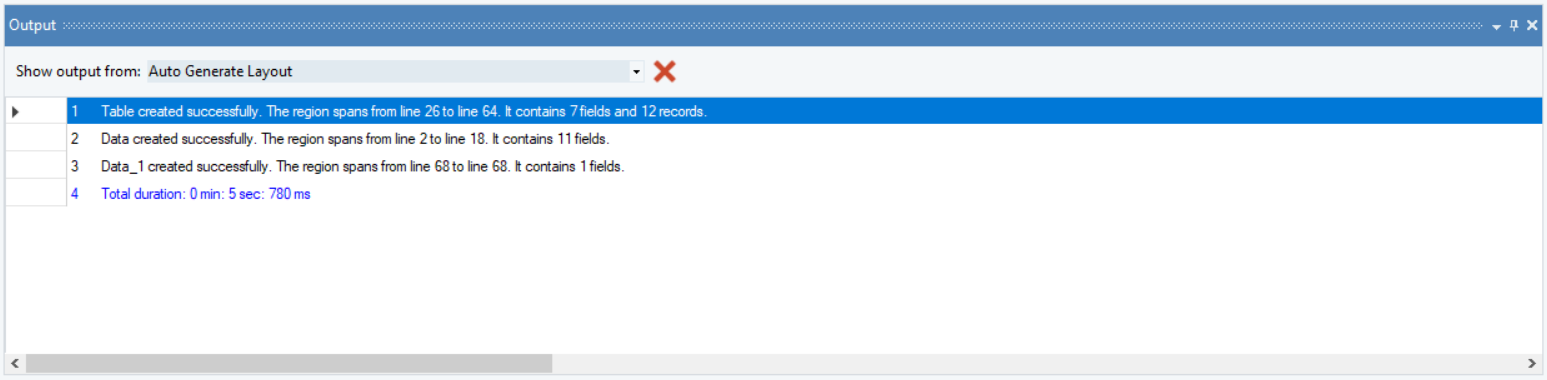
Notice that it only took roughly 5 seconds to generate this layout, which is much faster than manually creating the layout from scratch.
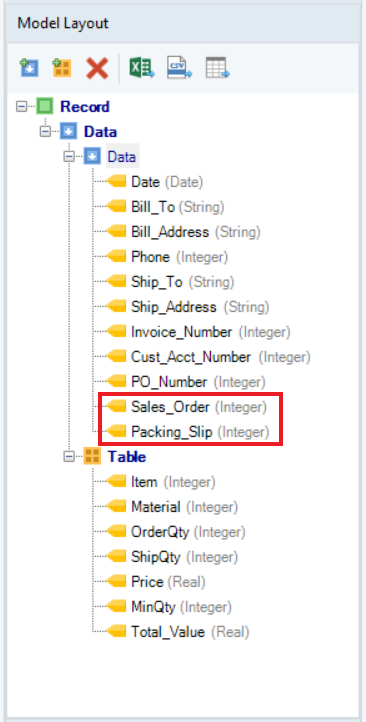
6. The Model Layout panel shows the regions and data fields extracted in this report model. The Data node contains name-value pairs, whereas the Table region contains the information stored in the table.
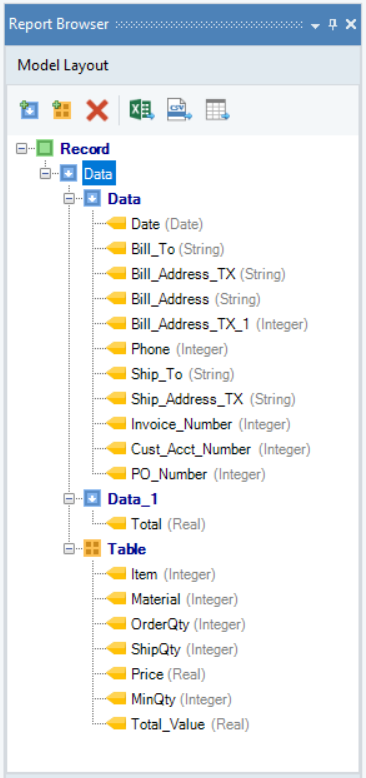
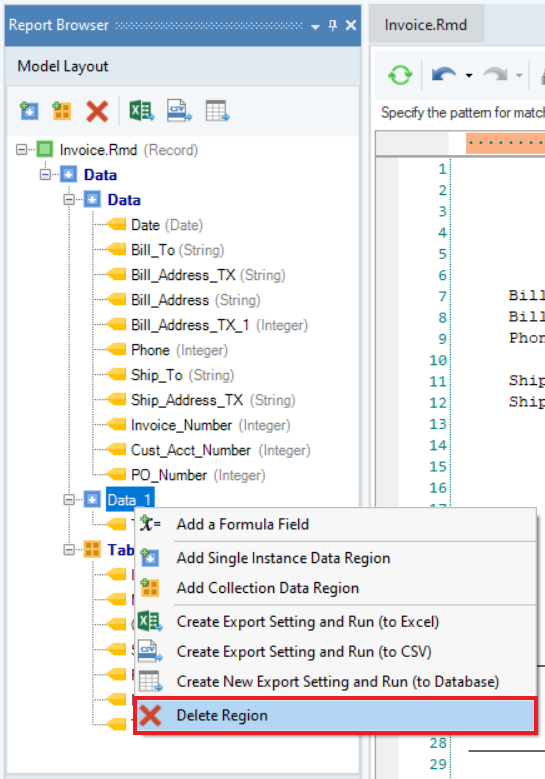
7. The Data_1 node contains only one field, Total. Since we do not want to extract that information in this use-case, let’s delete that region. Right-click on the node and select Delete Region from the context menu.
8. The Bill Address field has not been captured correctly.

We can fix this by deleting extra fields (Bill_Address_TX and Bill_Address_TX_1) and increasing the length of the field in the Field Properties panel.
The same is the case with the Ship_Address_TX field. We can edit the properties of the field, mainly its start position and field length, to capture the data in the field completely.
Auto Create Fields (Single-Instance) (Beta)
However, not all the information has been captured in the name-value data region. Some lines with useful information (line 20-21) are not even the part of the data region (highlighted in grey). This is because the key-value pairs with no separator in between were not captured by the AGL algorithm. You may refer to the Best Practices section to understand how to get the most accurate results using the AGL feature.
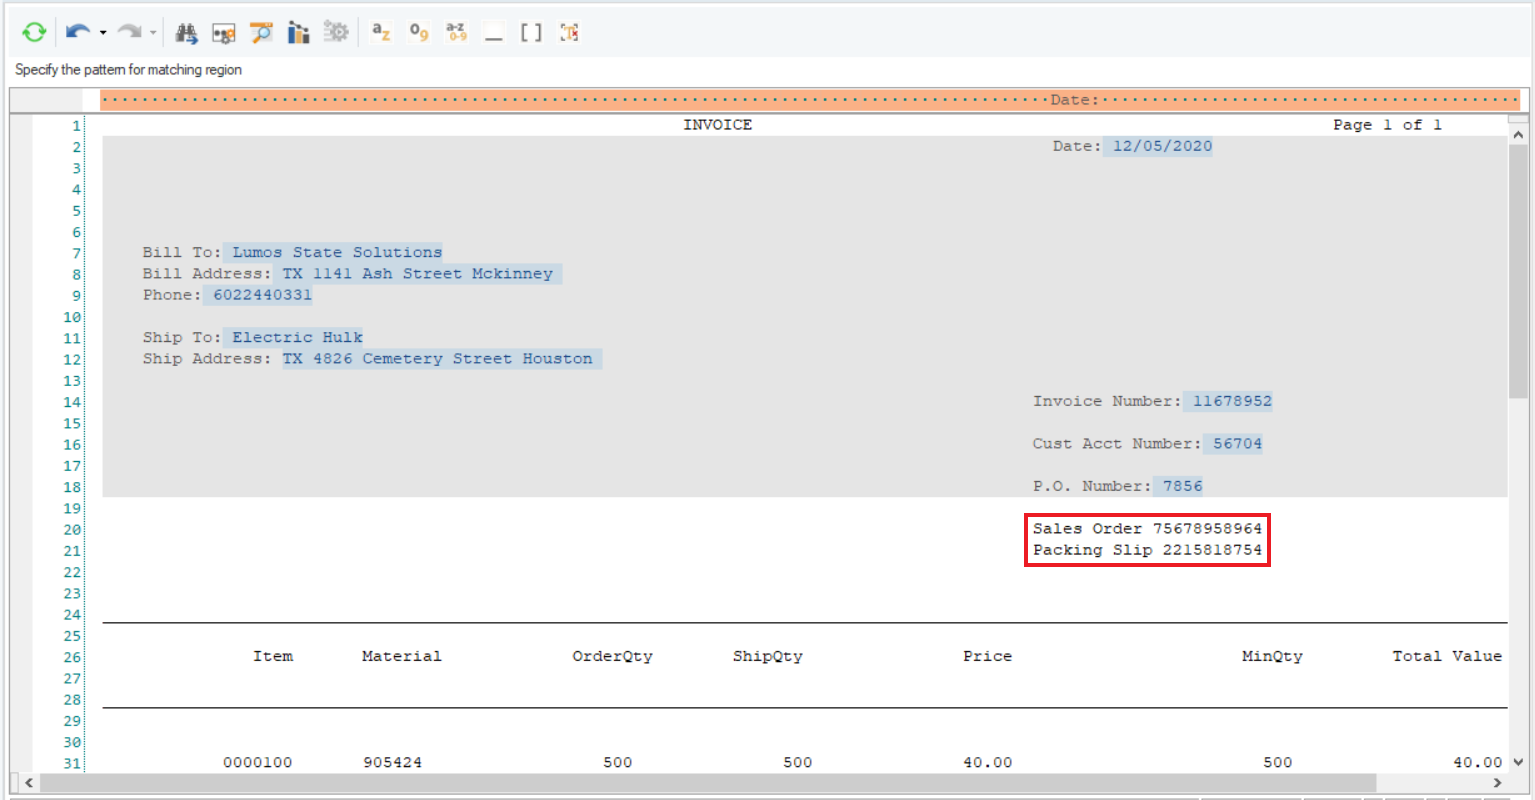
1. To fix this issue, we can increase the Line Count of the region in the Region Properties panel.
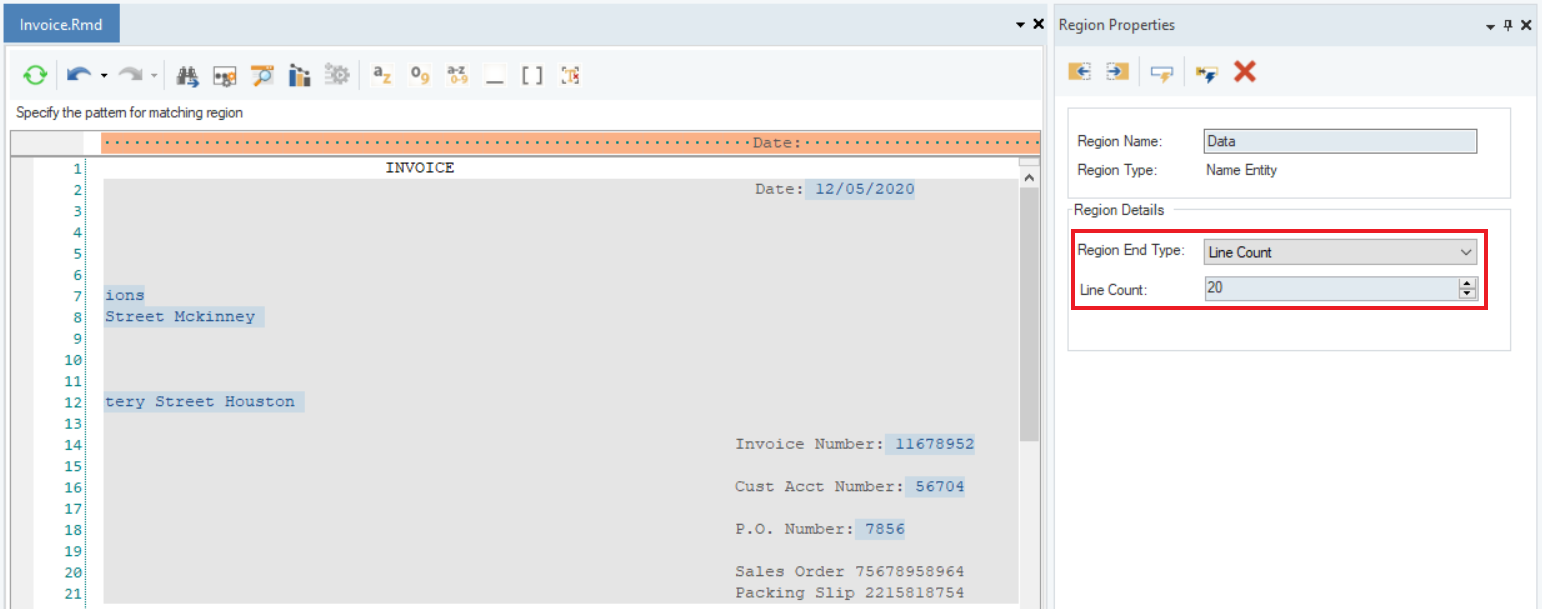
2. a. To capture Sales Order and Packing Slip fields, select the data on the designer, right-click on the designer, and select the Auto Create Field (Single-Instance) (Beta) option from the context menu.

b. Alternatively, after selecting the data, you may click on the Auto Create Fields (Single-Instance) (Beta) option in the Region Properties panel.
Notice that there is another option, Auto Create Fields (Collection), in the Region Properties panel. You do not have to select the data on the designer to use the latter, this is how the two options differ in usability.
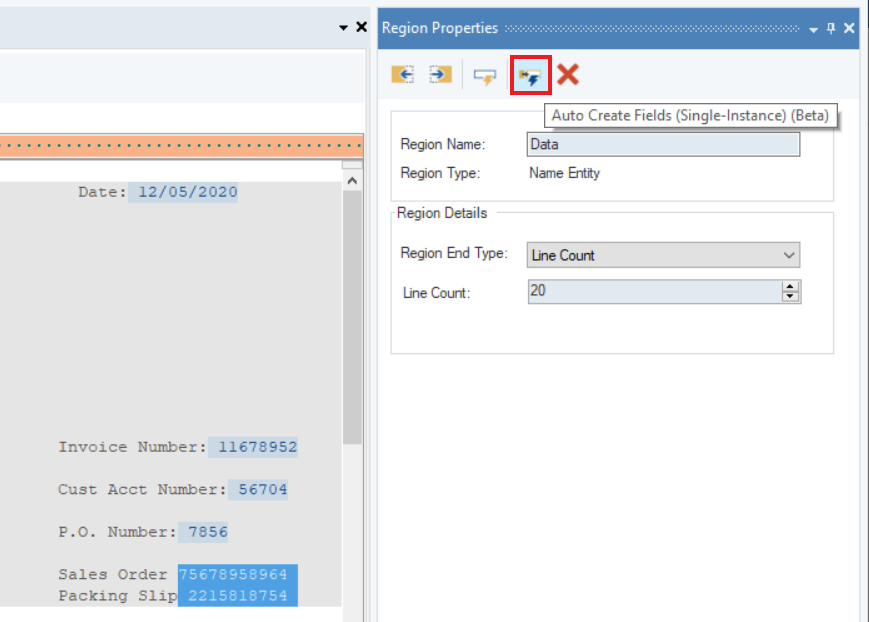
Note: Make sure the correct region is selected while using this option.
3. An Output window will open showing the status of the process.
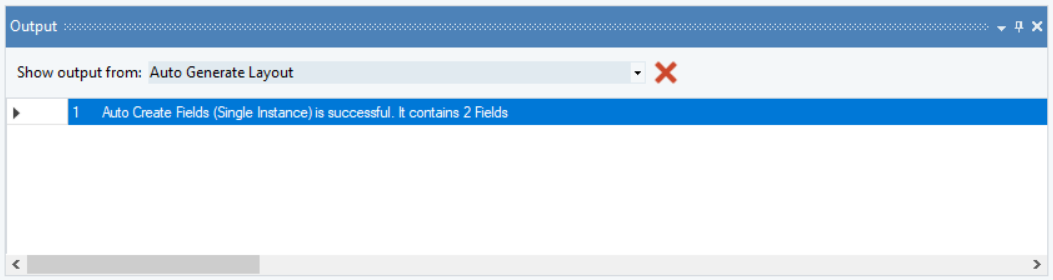
4. We can check the Model Layout panel to see if two new fields have been created.
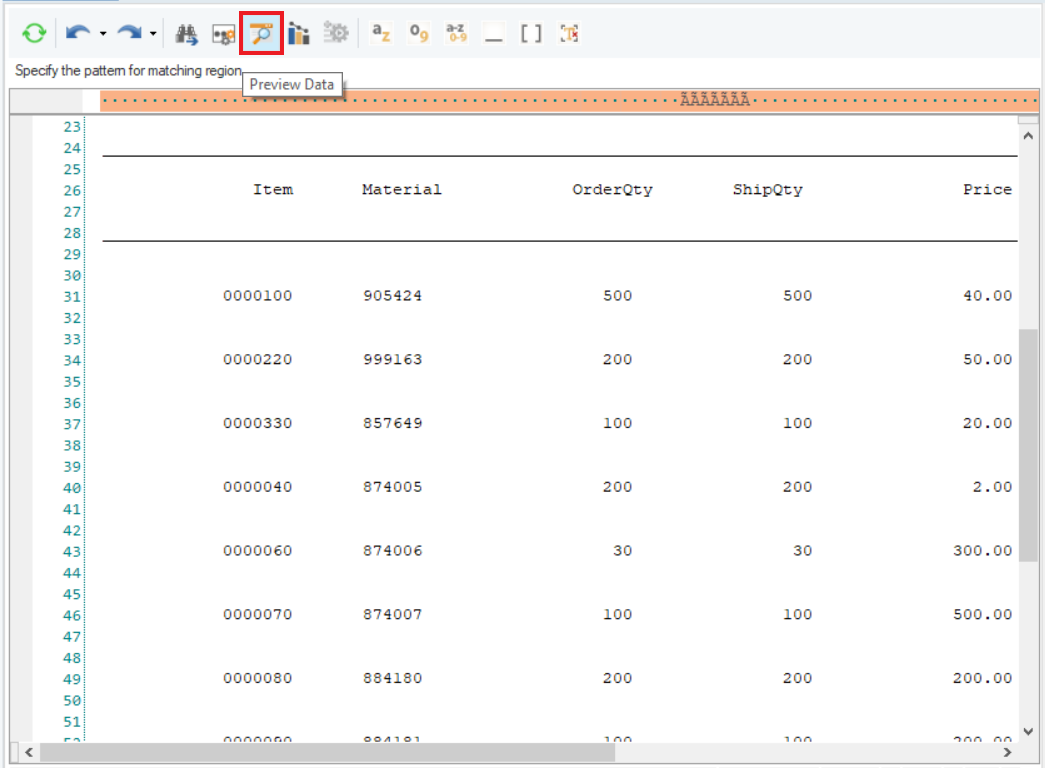
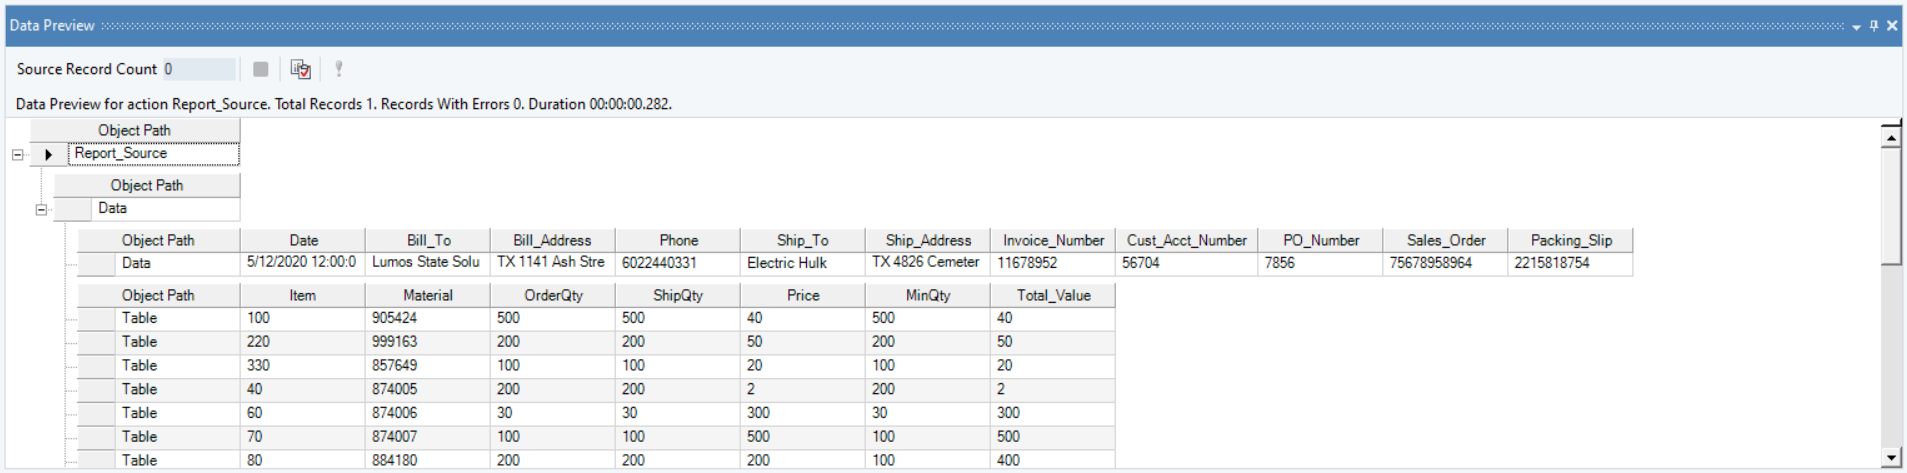
5. You can also preview the data using the Preview Data option from the toolbar. A Data Preview window will open showing the extracted regions and fields.
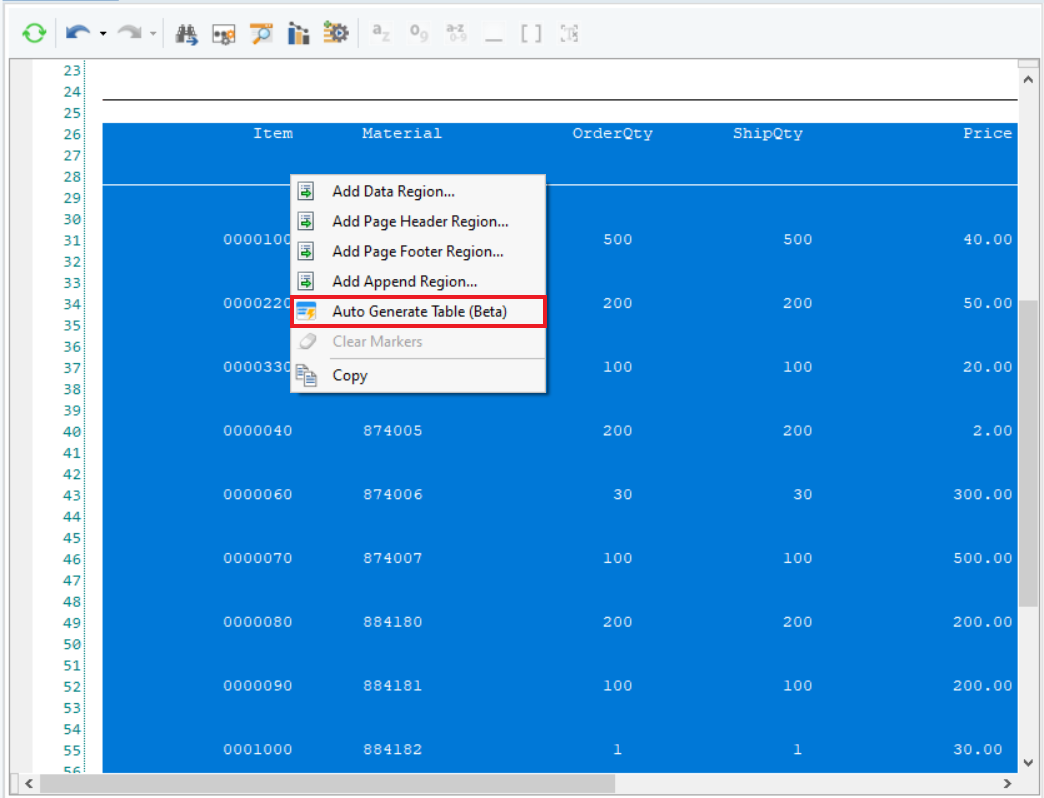
Auto Generate Table (Beta)
In case you want to extract the table only from the unstructured document, you can use the Auto Generate Table option.
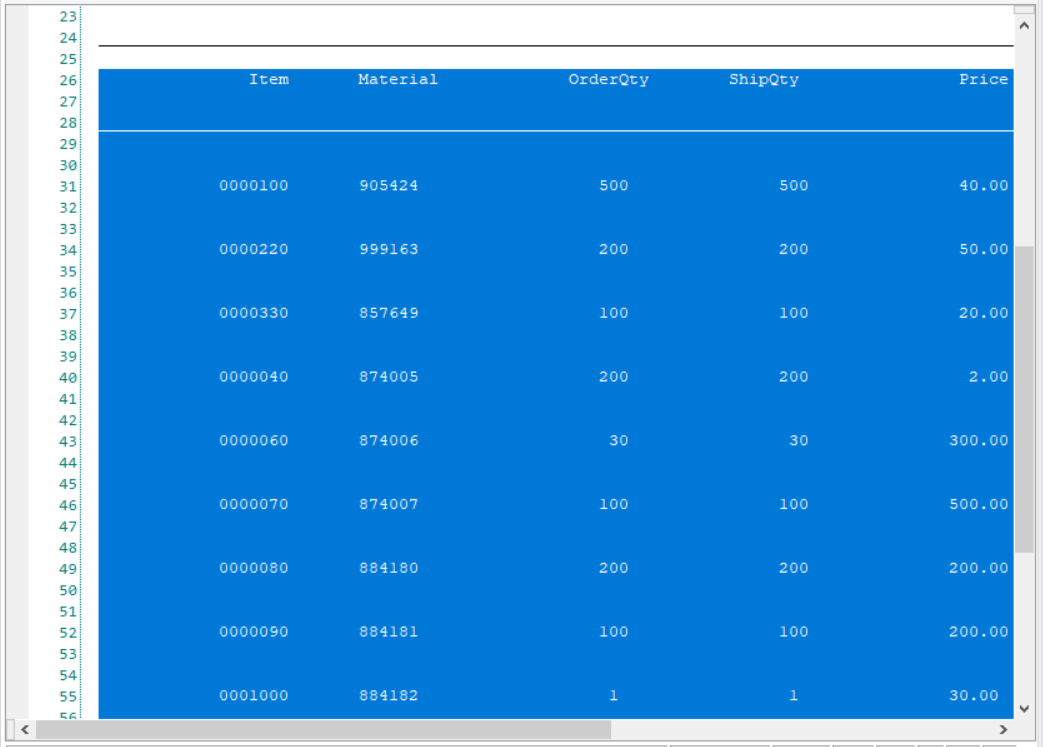
1. Select the complete data which is a part of the table region. Make sure the first line of the selection contains the headers of the table.
Note: For best results, the headers must all be in one line. If they are not, you may have to specify the number of rows the header spans over in the Region Properties panel. For more details, refer to the Best Practices section.
2. Right-click on the designer and select the Auto Generate Table (Beta) option from the context menu.
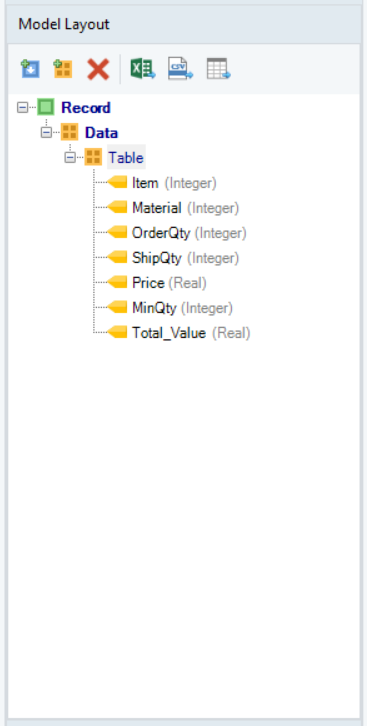
3. Again, a Progress window will show the progress of the operation and the Output window will show the status of the newly created table region.


4. You can see all the fields created in the table region in the Model Layout panel.
This concludes the discussion on Auto-Generate Layout feature in Astera ReportMiner.